
Adding security headers using Cloudflare is particularly beneficial for those utilizing managed web services like Ghost(Pro), Squarespace, Shopify, and others, where direct server access is restricted, but you have control over the domain.
In this blog post, I will guide you through the steps of adding security headers using Cloudflare, making the process much simpler and hassle-free, without even touching a single line of code on your web server.
Setup HTTP Security Header Using Cloudflare
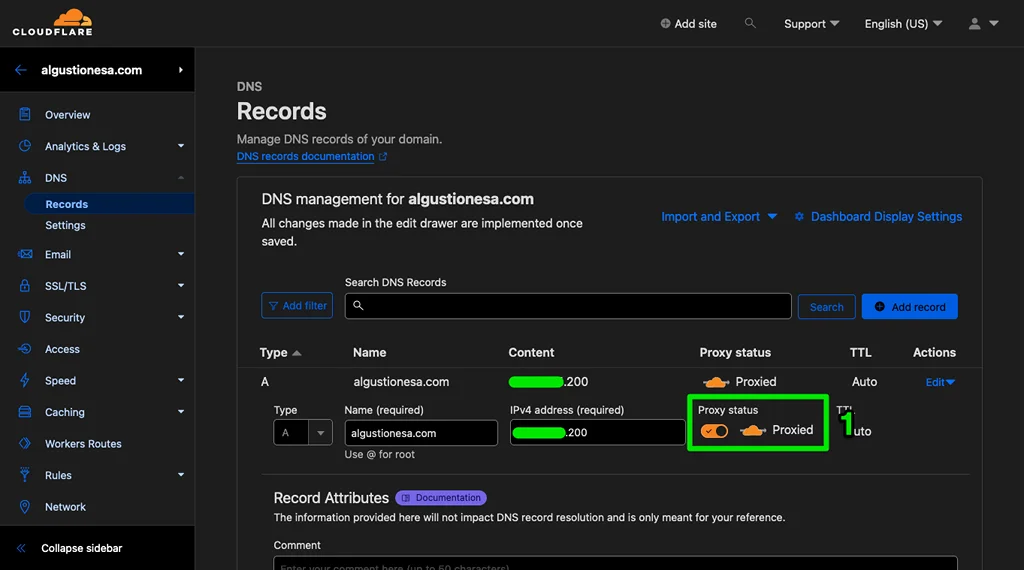
- Make sure you have added your domain to Cloudflare and have activated the orange cloud.
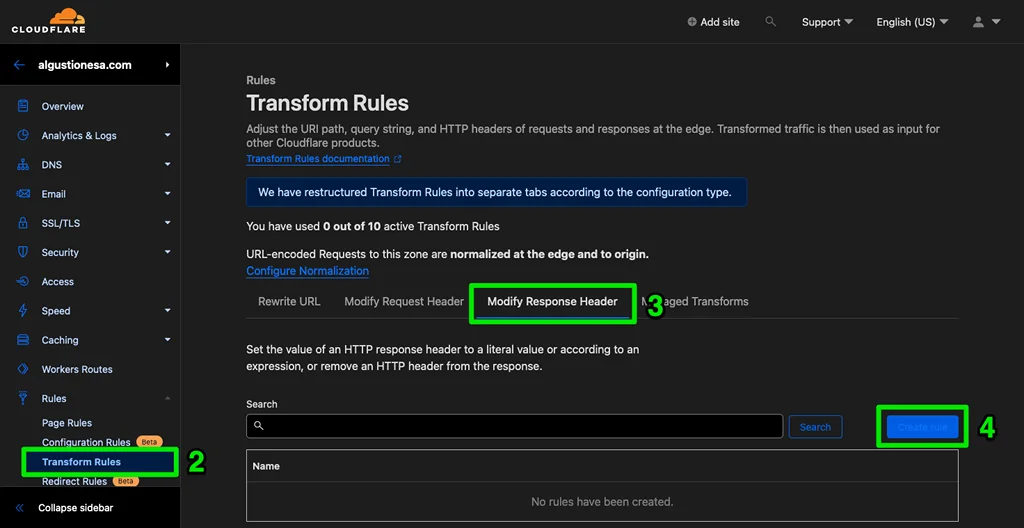
- From your domain dashboard, go to Rules and navigate to Transform Rules.
- On the Transform Rules page, select Modify Response Header.
- Click the Create rule button to create a new rule.
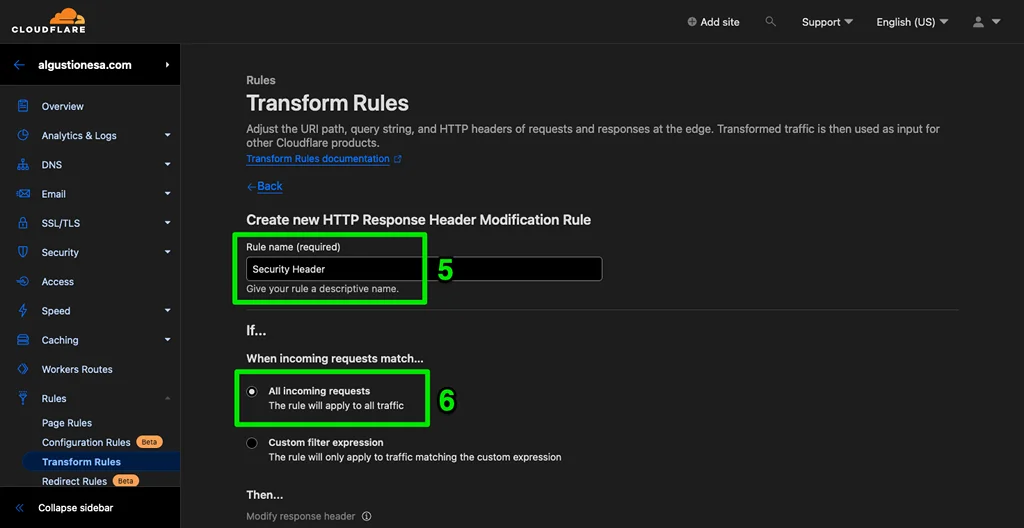
- Give the rule a name; here, I will name mine “Security Header”.
- Since I need to apply this rule to All incoming requests to my website, I select the first option for the If… section.
- In the Then… section, I will use Set static to set up security headers for my site. Here, I will add 5 recommended security headers:
| Header name | Value |
|---|---|
| x-content-type-options | nosniff |
| x-frame-options | SAMEORIGIN |
| x-xss-protection | 1; mode=block |
| strict-transport-security | max-age=31536000; includeSubDomains; preload |
| referrer-policy | no-referrer-when-downgrade |
Recommended security headers for all websites.
To further strengthen the security of my website, I will also set the Content Security Policy (CSP) header. While there are multiple values available for CSP, I will opt for a less restrictive one.
| Header name | Value |
|---|---|
| content-security-policy | upgrade-insecure-requests; block-all-mixed-content |
Utilize the Content Security Policy header to enhance website security.
Since my blog is a simple website that works well without the need to access powerful browser features, I will deny access to those features by adding a permission policy header.
| Header name | Value |
|---|---|
| permissions-policy | accelerometer=(), camera=(), geolocation=(), gyroscope=(), magnetometer=(), microphone=(), midi=() |
Restrict access to browser features using the Permission Policy header.
Here’s how the header setup looks when it’s all added up:
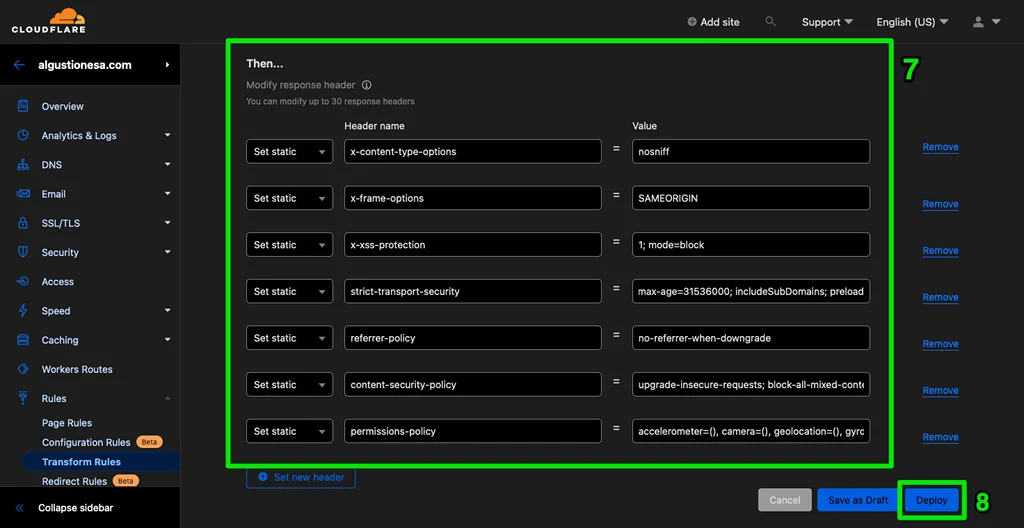
- Click Deploy to add the security header to your site.
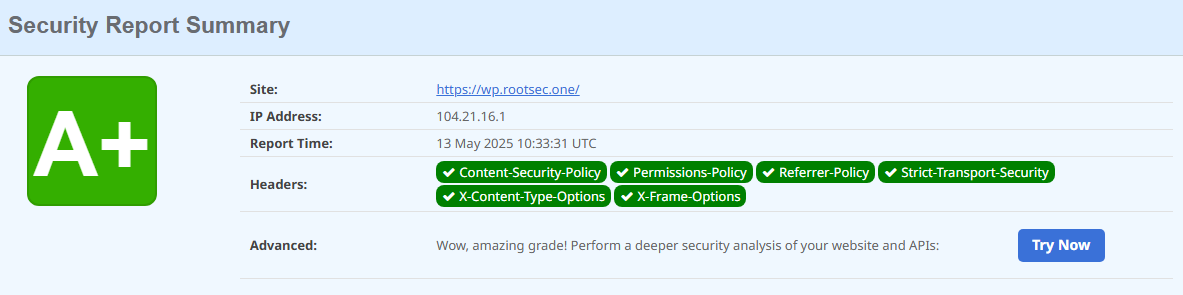
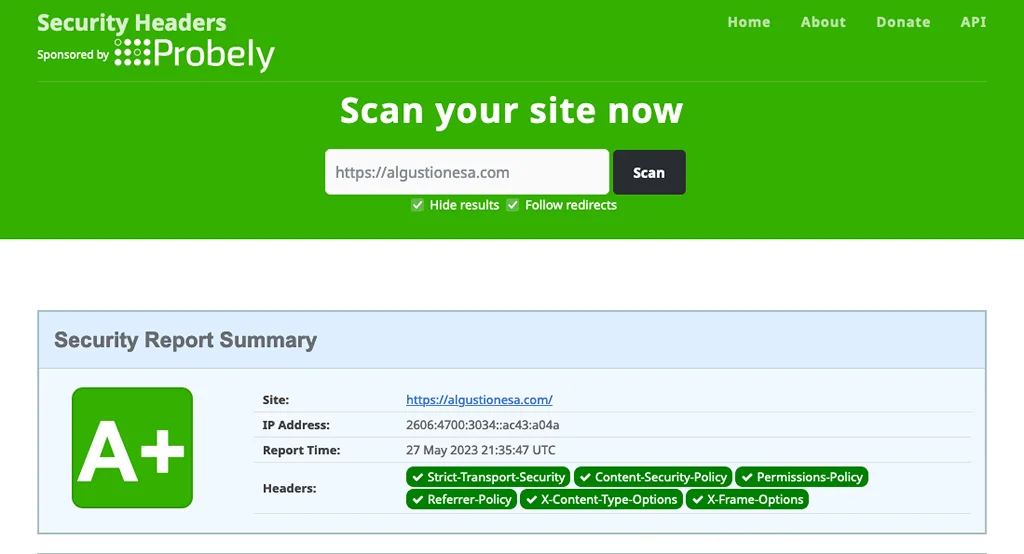
Go to securityheaders.com to check the result. Here is mine:
It’s important to note that not every web service is compatible with Cloudflare’s orange cloud. Before implementing it, please contact your service provider to ensure compatibility.
While some headers are straightforward to set up with recommended values, configuring the Content Security Policy (CSP) requires a deeper understanding of the resources loaded on your website. If you are not familiar with it, I recommend consulting with a developer or, if you are developing your site yourself, taking the time to configure it correctly to maximize its effectiveness and avoid any potential issues.
I am someone who appreciates applying web security best practices, but please note that I am not a security expert. If you would like to learn more about security headers, I recommend reading the Security Headers Quick Reference and the HTTP Headers Reference from MDN Web Docs. These resources provide valuable information to further enhance your understanding and implementation of security headers.
Closing
By leveraging Cloudflare, you can add an extra layer of security to your website, protecting it from various threats. Not only does Cloudflare enhance security, but it also optimizes web performance and provides insightful web analytics. Cloudflare is an invaluable asset for website owners, offering a comprehensive suite of features, all available for free.